Nextcloud Desktop-Client
Configuration of the Nextcloud Desktop Client
This is a short description of how to configure the Nextcloud desktop client to use the cloud server of the Department of Informatics. You'll need an Informatics user account that has been activated for our cloud services. For detailed information on using the Nextcloud, please refer to the vendor's documentation.
Download & Installation
The Nextcloud client can be obtained from the Nextcloud website. Please run the installation routine.
Configuration
After installation, the Nextcloud client will run for the first time. You must select "Log on to server" by specifying the following server address:
Server address: https://fbicloud.informatik.uni-hamburg.de

After confirming with "continue" a browser window opens and the login with the Informatics ID is requested. If the browser window does not open, please copy the link from the Nextcloud configuration window and do it yourself. If the login was successful, the Nextcloud client will be allowed to access the Nextcloud by clicking "grant access". If the authentication is unsuccessful, please contact the admins(fbicloud"AT"informatik.uni-hamburg.de).
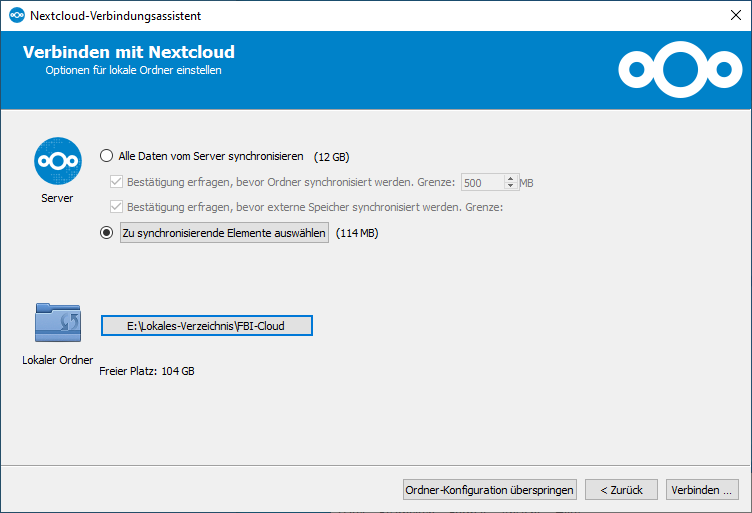
Afterwards the synchronization elements can be selected. Make a selective choice if not all files should be synchronized into your local directory.
In addition, a local directory must be selected for the installation.
Important: Please choose a local directory on your computer for the installation. Installation in a directory that is integrated from the Informatics network via a network protocol (e.g. the home directories on the pools and employee computers) will cause difficulties. Files would be synchronised both to the Informatics network and to the Nextcloud via the synchronized directory.
The installation is now complete. If required, the option for automatic execution of the Nextcloud client at system startup must still be selected depending on the target platform.